so here is how it was done
1) gather the fabric that you will need.
i used a fabric that is 100% bamboo, i just so happened
to found it when i was looking for material and it was
great for this project so i'm pleased.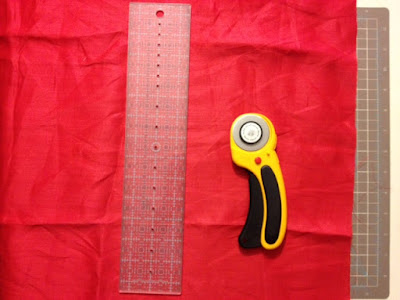 2) then apply fabric stiffener on to the fabric. the more
you put onto the fabric the stiffer it gets and you want
it to be stiff!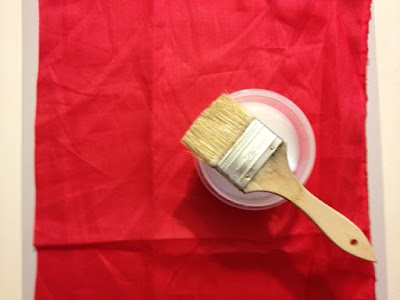 3) wait for a few hours or even over night to let the fabric
to dry. if the fabric gets wrinkly as it dry, you can always
iron it nice and flat when it's dried. cut the fabric into
smaller squares: 5", 4", 3" etc. the number of squares
you need depends on how "full" you want your flower
to be, the more layers (squares) the fuller.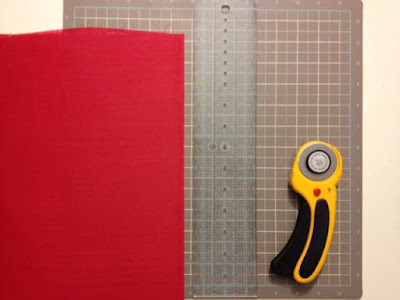 4) like this.
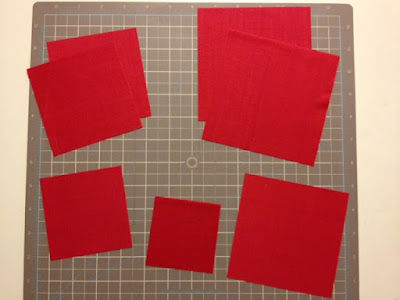 5) you will also need some tulle. same color or in different
color is more personal preference. i used same color here.
so after you cut out the fabric into squares, cut the same
amount of square tulle as well.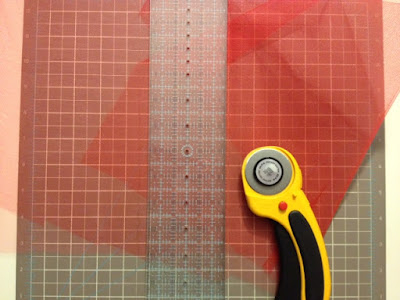 6) fold the squares in half
 7) then fold in half again
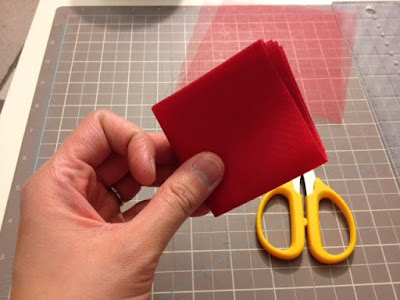 8) then fold in half again to make this small triangle
 9) cut the top of the triangle and make it nice and round
 10) finally all done with the cutting!
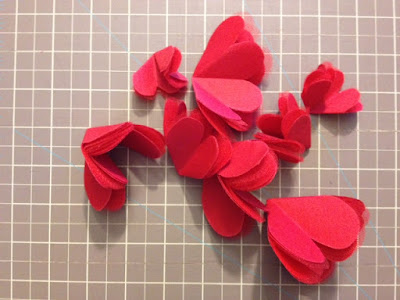 11) unfold the squares and you will find a nice flower petal
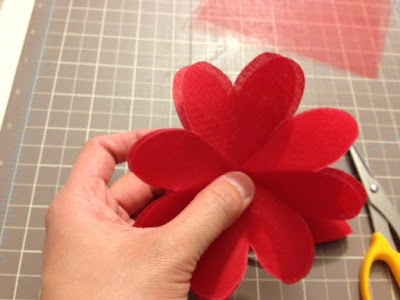 12) stack the petals up. interchanging the fabric and the tulle
and then thread it through the middle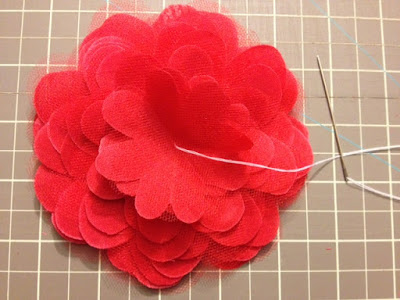 13) add some pearl beads to the middle of the flower
 14) scrunch the petals up a bit
  15) and here you go! ta-da!

1) gather the fabric that you will need.
i used a fabric that is 100% bamboo, i just so happened
to found it when i was looking for material and it was
great for this project so i'm pleased.
 2) then apply fabric stiffener on to the fabric. the more
you put onto the fabric the stiffer it gets and you want
it to be stiff!
 3) wait for a few hours or even over night to let the fabric
to dry. if the fabric gets wrinkly as it dry, you can always
iron it nice and flat when it's dried. cut the fabric into
smaller squares: 5", 4", 3" etc. the number of squares
you need depends on how "full" you want your flower
to be, the more layers (squares) the fuller.
 4) like this.
 5) you will also need some tulle. same color or in different
color is more personal preference. i used same color here.
so after you cut out the fabric into squares, cut the same
amount of square tulle as well.
 6) fold the squares in half
 7) then fold in half again
 8) then fold in half again to make this small triangle
 9) cut the top of the triangle and make it nice and round
 10) finally all done with the cutting!
 11) unfold the squares and you will find a nice flower petal
 12) stack the petals up. interchanging the fabric and the tulle
and then thread it through the middle
 13) add some pearl beads to the middle of the flower
 14) scrunch the petals up a bit
  15) and here you go! ta-da!
No comments:
Post a Comment